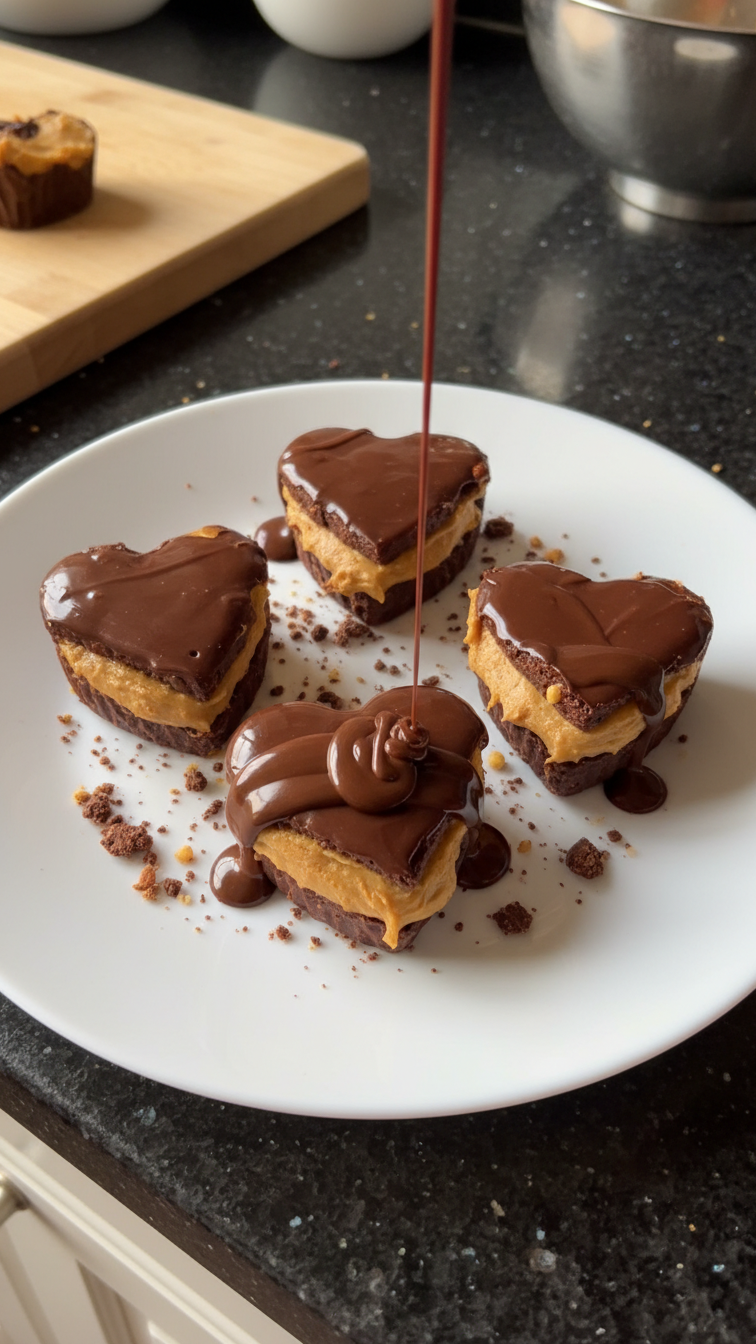
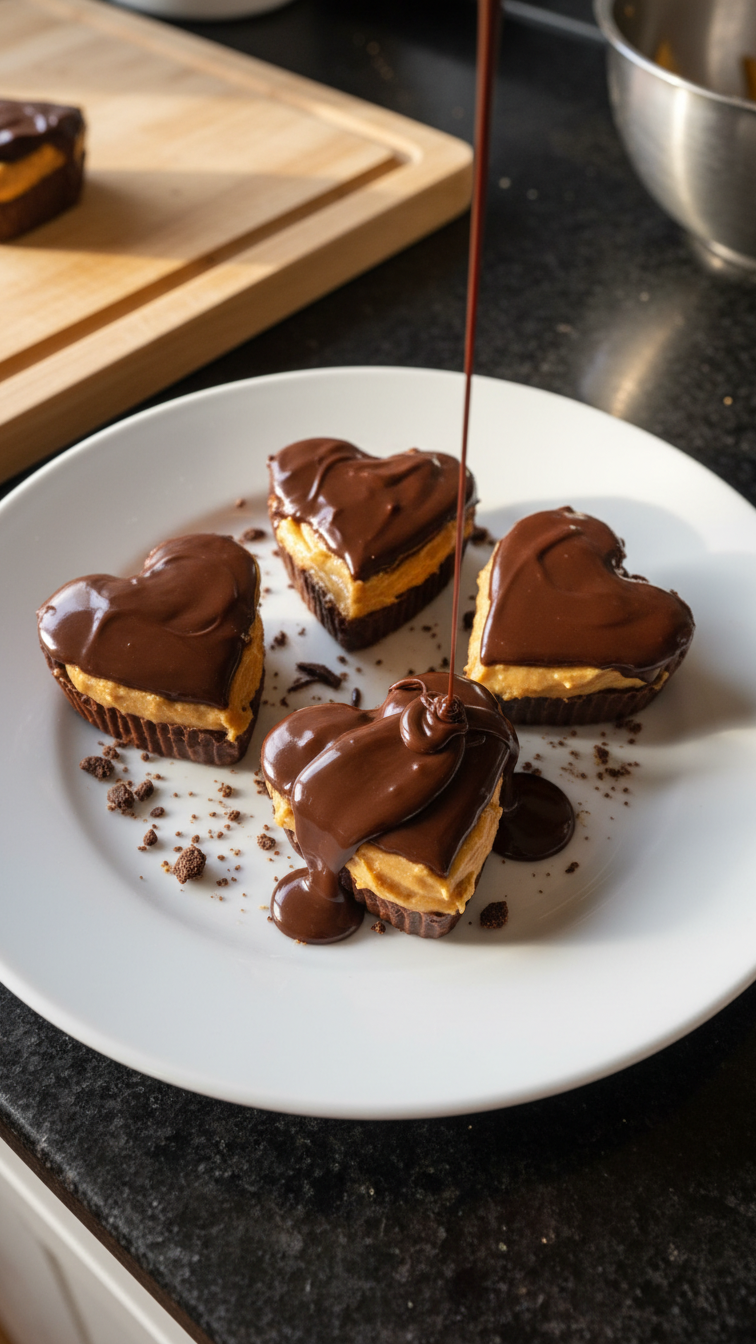
Peanut Butter Chocolate Heart Cups
Highlighted under: Artisanal Baking Recipes
I absolutely adore making Peanut Butter Chocolate Heart Cups because they're the perfect blend of sweet and salty. Each bite is a delightful mix of creamy peanut butter and rich chocolate, creating a treat that never fails to bring a smile. Personally, I find that making these cups is not only easy but also a fun activity. Using simple ingredients, I can whip them up in no time, making them ideal for unexpected guests or special occasions. Let’s dive into this exciting home-baked treat!
When I first made Peanut Butter Chocolate Heart Cups, I was blown away by how simple yet delicious they were. I tried various recipes before settling on this method, which balances the sweetness of chocolate with the earthy notes of peanut butter. This particular combination creates an unforgettable flavor that pairs exquisitely well.
One key tip I learned is to chill the peanut butter filling slightly before molding it into the chocolate. This allows it to hold its shape better and prevents it from blending too much with the chocolate layer. Trust me, this extra step takes your heart cups to the next level!
Why You'll Love These Cups
- Decadent chocolate shell that cracks perfectly to reveal creamy peanut butter.
- Rich and satisfying flavor combination that's hard to resist.
- Fun and easy to make at home for any occasion.
Techniques for Perfect Chocolate Cups
To achieve a glossy chocolate shell, proper melting is key. When melting the dark chocolate chips and coconut oil, ensure you stir every 30 seconds to prevent overheating. Overheated chocolate can seize up, ruining its smooth texture. If this happens, add a small amount of coconut oil, heat briefly, and stir until it reaches a silky consistency.
While spooning melted chocolate into the molds, it's important to work quickly but carefully. Using a silicone brush or the back of a spoon ensures the chocolate coats evenly. You want a sufficient layer to support the filling, yet thin enough to crack deliciously when bitten into. Aim for about 1/8 inch thickness on the sides.
Peanut Butter Filling Insights
The balance of creamy peanut butter and powdered sugar is crucial for the filling's texture and flavor. The powdered sugar helps to sweeten the peanut butter without making it overly runny, allowing for a substantial filling that holds its shape. To achieve a smoother blend, I recommend sifting the powdered sugar before mixing, which prevents lumps.
For a twist on the classic filling, try adding a pinch of cinnamon or a splash of vanilla extract. These additions can enhance the flavor profile, making the cups even more delightful. If you're looking to make these vegan or free of dairy, opt for a plant-based chocolate and natural peanut butter without added sugars.
Storage and Serving Suggestions
These Peanut Butter Chocolate Heart Cups can be stored in an airtight container in the freezer for up to three months. This not only preserves their freshness but also allows you to enjoy a sweet treat on demand. Just pull them out and let them sit at room temperature for about 10 minutes before serving for the best texture.
For a fun presentation, consider serving these cups with fresh fruits like strawberries or banana slices, which complement the chocolate and peanut butter beautifully. You can also dust them with cocoa powder or more sea salt for an added visual and taste flair. These cups are perfect not only for snacking but also as a charming dessert at gatherings.
Ingredients
Gather the following ingredients before you begin:
Ingredients
- 1 cup creamy peanut butter
- 1/2 cup powdered sugar
- 1 cup dark chocolate chips
- 1/4 cup coconut oil
- Sea salt (for sprinkling)
Make sure all ingredients are at room temperature for the best results.
Instructions
Follow these steps to create your delicious cups:
Prepare the Chocolate
In a microwave-safe bowl, combine the dark chocolate chips and coconut oil. Heat in the microwave in 30-second intervals, stirring in between, until fully melted and smooth.
Mold the Chocolate
Spoon a small amount of the melted chocolate into each cup of a heart-shaped silicone mold, and use a brush or the back of a spoon to cover the sides. Place the mold in the freezer for about 10 minutes to set.
Make the Filling
In a bowl, mix the creamy peanut butter and powdered sugar until smooth. Remove the mold from the freezer and spoon the peanut butter mixture into each chocolate cup, filling it almost to the top.
Seal and Chill
Cover the peanut butter filling with the remaining melted chocolate, and spread it to create an even surface. Sprinkle a tiny pinch of sea salt on top for extra flavor.
Final Freeze
Return the mold to the freezer for another 20 minutes. Once set, gently remove the cups from the mold and enjoy!
Store any leftovers in an airtight container in the refrigerator!
Pro Tips
- For a flavor twist, try adding a sprinkle of crushed nuts or a dash of cinnamon to the peanut butter mixture.
Common Mistakes and Tips
One common mistake is underfilling the chocolate cups with the peanut butter mixture. Make sure to fill them generously, as the filling can shrink slightly when set, leaving a hollow center. Use a spoon to press the filling well into the mold, ensuring each cup is satisfyingly packed.
Pay attention to the setting times in both freezing stages. If you remove the mold too early, the chocolate might not be firm enough and risk breaking. If they feel too soft after 20 minutes, consider letting them freeze an additional 10 minutes to achieve that perfect firmness.
Scaling the Recipe
If you're looking to make a larger batch for parties or gatherings, this recipe scales beautifully. Simply double the ingredients and use multiple mold trays. Just keep in mind to adjust your melting technique accordingly; you may need to melt the chocolate in batches to prevent it from hardening before you're done molding.
Conversely, if you want to make a smaller quantity, you can easily halve the recipe. This is perfect for a quick treat without the commitment of a full batch. Just be mindful to measure ingredients accurately, as the balance is key to maintaining that delightful flavor and texture.
Questions About Recipes
→ Can I use milk chocolate instead of dark?
Yes, milk chocolate will create a sweeter flavor, which is also delicious!
→ How long do these cups last?
They can be stored in the refrigerator for up to a week, but they'll likely be eaten much sooner!
→ Can I make these vegan?
Absolutely! Just use a dairy-free chocolate and ensure your peanut butter is vegan-friendly.
→ What kind of peanut butter is best?
Smooth and creamy peanut butter works best for filling, but if you like crunch, feel free to use crunchy peanut butter!
Peanut Butter Chocolate Heart Cups
Created by: The Sizedbliss Team
Recipe Type: Artisanal Baking Recipes
Skill Level: Beginner
Final Quantity: 12 cups
What You'll Need
Ingredients
- 1 cup creamy peanut butter
- 1/2 cup powdered sugar
- 1 cup dark chocolate chips
- 1/4 cup coconut oil
- Sea salt (for sprinkling)
How-To Steps
In a microwave-safe bowl, combine the dark chocolate chips and coconut oil. Heat in the microwave in 30-second intervals, stirring in between, until fully melted and smooth.
Spoon a small amount of the melted chocolate into each cup of a heart-shaped silicone mold, and use a brush or the back of a spoon to cover the sides. Place the mold in the freezer for about 10 minutes to set.
In a bowl, mix the creamy peanut butter and powdered sugar until smooth. Remove the mold from the freezer and spoon the peanut butter mixture into each chocolate cup, filling it almost to the top.
Cover the peanut butter filling with the remaining melted chocolate, and spread it to create an even surface. Sprinkle a tiny pinch of sea salt on top for extra flavor.
Return the mold to the freezer for another 20 minutes. Once set, gently remove the cups from the mold and enjoy!
Extra Tips
- For a flavor twist, try adding a sprinkle of crushed nuts or a dash of cinnamon to the peanut butter mixture.
Nutritional Breakdown (Per Serving)
- Calories: 380 kcal
- Total Fat: 26g
- Saturated Fat: 15g
- Cholesterol: 195mg
- Sodium: 85mg
- Total Carbohydrates: 32g
- Dietary Fiber: 3g
- Sugars: 24g
- Protein: 6g