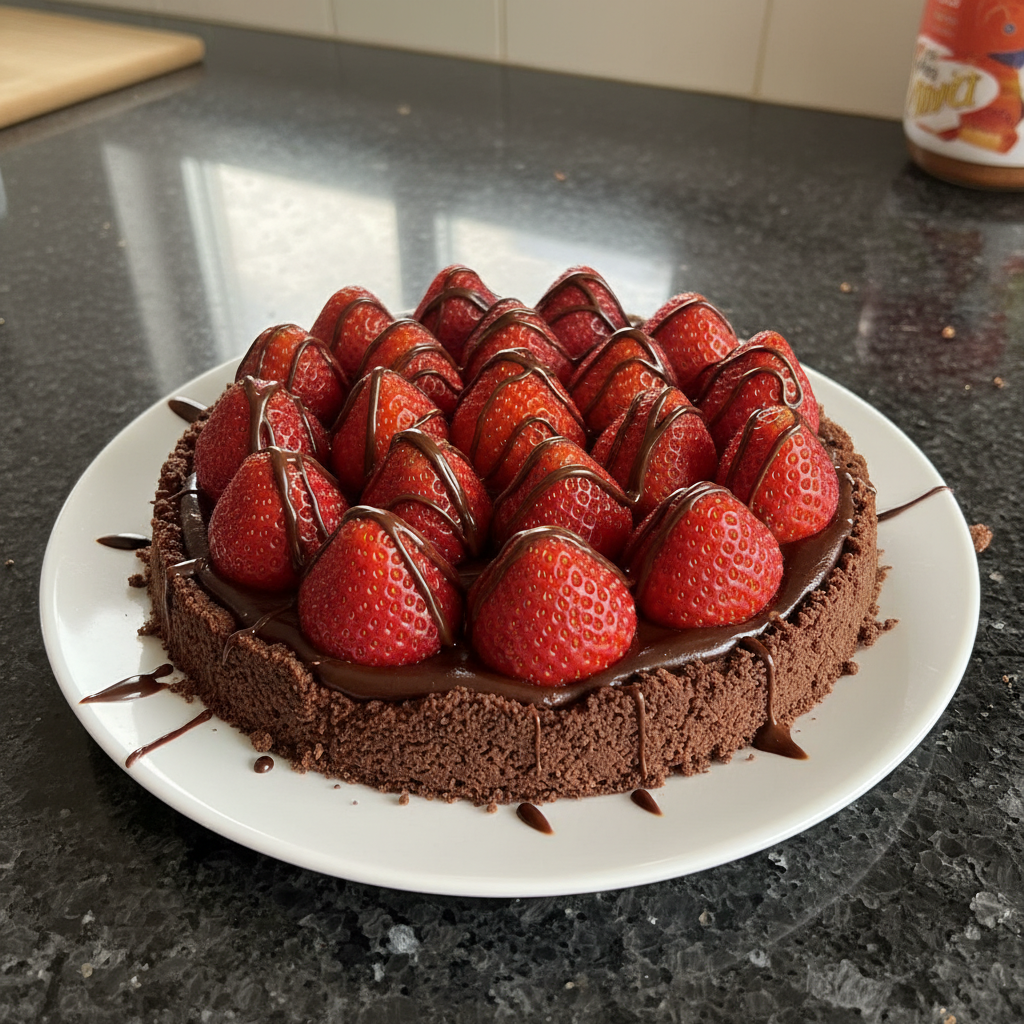
Chocolate Strawberry Tart with Whipped Cream
Highlighted under: Artisanal Baking Recipes
I absolutely adore this Chocolate Strawberry Tart with Whipped Cream! It brings together the rich taste of chocolate and the sweetness of fresh strawberries in a way that is simply irresistible. Whenever I make it, I can’t help but smile at the look on my friends’ faces as they take their first bites. The buttery crust complements the creamy filling perfectly, making this dessert a showstopper for any occasion—whether it's a fancy dinner party or a cozy family gathering.
When I first attempted to make this Chocolate Strawberry Tart, I was a bit intimidated by the thought of creating a homemade tart shell. However, after a couple of practice runs, I mastered it and now it feels like second nature! The key is to chill the dough before rolling it out, which prevents it from becoming too sticky.
Another great tip I picked up along the way is to use high-quality dark chocolate for the filling. It really elevates the overall flavor of the tart and pairs beautifully with the fresh strawberries, making every bite heavenly.
Why You Will Love This Recipe
- Decadent chocolate filling with a hint of vanilla
- Fresh strawberries add a burst of flavor
- Perfectly balanced between creamy and crunchy
Mastering the Tart Crust
The tart crust is the foundation of this dessert, and achieving the right texture is crucial. Make sure your butter is chilled but not frozen; this will help you create a flaky crust. When you cut in the butter, aim for pea-sized pieces. This method ensures that the crust will have that golden, tender crumb once baked. If at any point the dough feels too warm while rolling it out, pop it back in the fridge for a few minutes to avoid any stickiness.
Another tip is to prick the bottom of the crust with a fork before baking. This prevents air bubbles from forming, ensuring an even bake. Once it's out of the oven, let it cool completely before adding the chocolate filling to prevent it from melting. If you're short on time, you can also use a pre-made tart shell, but be mindful of the flavors and textures—nothing beats a homemade crust!
Keep in mind that the crust can be made ahead of time. Once baked and cooled, wrap it tightly in plastic wrap and store it in the refrigerator for up to 2 days. This not only saves time when you’re ready to assemble the tart but allows the flavors to meld beautifully.
Chocolate Filling Tips
The chocolate filling is what elevates this tart to the next level, so it's essential to use high-quality dark chocolate for the best flavor. Look for chocolate that contains at least 70% cocoa to ensure a rich, decadent taste. The melting process is equally important; use a double boiler or heat the cream gently, avoiding boiling. This will help prevent the chocolate from seizing up and ensure a smooth, glossy filling by stirring continuously until melted and homogenous.
When adding the butter and vanilla extract, allow the chocolate mixture to cool slightly first. This prevents the butter from melting too quickly and helps maintain the creamy consistency. If your filling seems a bit too thick before pouring it into the crust, add a touch more cream to achieve that luxurious texture. Don’t rush this process—take your time to get it just right for the ultimate indulgence.
Make sure to let the filling set properly in the tart shell before adding the whipped cream topping. Allow it to chill in the fridge for at least two hours, which gives it time to firm up and ensures that each slice holds its shape beautifully, making for a visually stunning presentation.
Whipped Cream and Serving Suggestions
The whipped cream topping can be enhanced by adjusting the sweetness and flavor. If you prefer a less sweet whipped cream, reduce the powdered sugar to taste. For an extra hint of flavor, consider infusing the cream with a few drops of almond extract or even a splash of liqueur like Amaretto before whipping. This little twist can make your tart even more delightful and sophisticated.
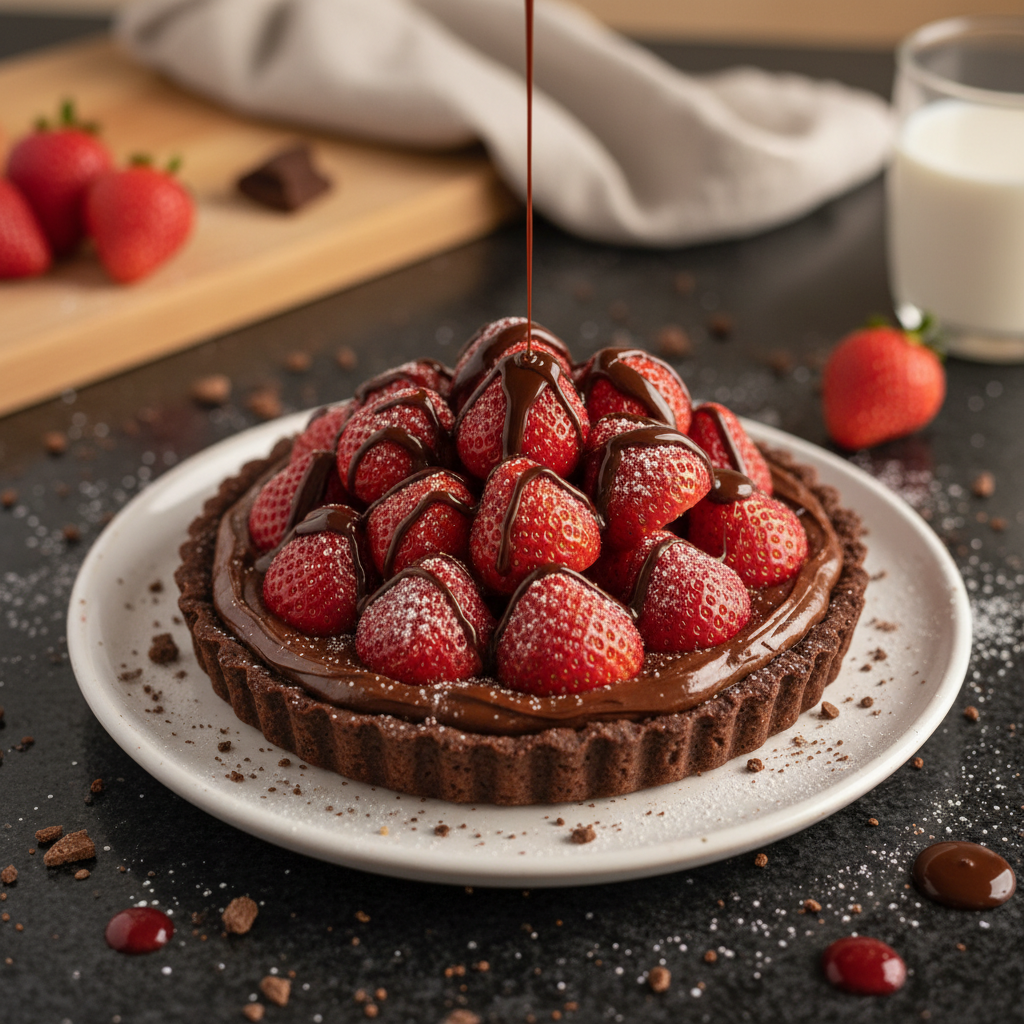
When serving, I like to garnish with additional whole strawberries for a pop of color. Slicing the strawberries just before serving not only looks great but keeps them fresh. If you’d like, you can also drizzle some chocolate sauce over the top for an added touch of decadence. This tart pairs beautifully with a scoop of vanilla ice cream for those who want an extra indulgent treat.
If you're planning to make this tart ahead of time, it's best to add the whipped cream and strawberries closer to serving to retain their freshness. The assembled tart can be kept in the fridge for about 24 hours, but after that, the whipped cream may start to weep, compromising the texture. Just cover it well to maintain its deliciousness until you're ready to impress your guests!
Ingredients
For the Tart Crust
- 1 1/4 cups all-purpose flour
- 1/2 cup unsalted butter, chilled and diced
- 1/4 cup powdered sugar
- 1 egg yolk
- 2 tablespoons cold water
For the Chocolate Filling
- 8 ounces dark chocolate, chopped
- 1 cup heavy cream
- 1/4 cup granulated sugar
- 2 teaspoons vanilla extract
- 2 tablespoons unsalted butter
For the Topping
- 1 cup heavy whipping cream
- 2 tablespoons powdered sugar
- 1 teaspoon vanilla extract
- Fresh strawberries, sliced
Make sure all ingredients are fresh for the best results!
Instructions
Make the Tart Crust
In a bowl, combine flour and powdered sugar. Cut in butter until the mixture resembles coarse crumbs. Stir in egg yolk and cold water. Form into a ball, wrap in plastic, and refrigerate for 30 minutes.
Bake the Tart Shell
Preheat the oven to 350°F (175°C). Roll out the chilled dough and fit it into a tart pan. Prick the bottom with a fork and bake for 20 minutes or until lightly golden. Allow to cool.
Prepare the Chocolate Filling
In a saucepan over low heat, combine heavy cream, sugar, and chopped chocolate. Stir until melted and smooth. Remove from heat and stir in butter and vanilla extract. Cool slightly before pouring into the tart shell.
Whip the Cream
In a mixing bowl, whip heavy cream with powdered sugar and vanilla extract until soft peaks form. Spread or pipe onto the cooled tart, topped with sliced strawberries.
Serve and Enjoy
Chill the tart for at least 2 hours before slicing. Serve chilled and enjoy your delicious dessert!
Enjoy this decadent tart with family and friends!
Pro Tips
- For a more intense chocolate flavor, consider using a higher percentage of dark chocolate. Also, fresh strawberries are key—look for ones that are firm and bright red.
Ingredient Substitutions
If you need a dairy-free version of this tart, substitute the heavy cream with coconut cream, which works beautifully in both the filling and the whipped topping. Keep the chocolate or choose a dairy-free option to maintain the overall flavor profile. For an egg-free crust, you could try using a flax egg or simply omit the egg yolk, though the texture may be slightly different when you do so.
For those looking for a lower-sugar alternative, you can try using dark chocolate that contains stevia and reduce the granulated sugar in the filling. Similarly, opt for a sugar substitute in the whipped cream. Just remember to check the specific substitution ratios since they can vary between products.
Make-Ahead and Storage
This Chocolate Strawberry Tart is perfect for making ahead. You can prepare the crust a day in advance and store it wrapped in plastic in the fridge. The chocolate filling can also be made ahead; simply let it cool completely before pouring it into the tart shell. Once assembled, keep the tart in the fridge—it stays fresh for up to three days. Just wait to add the whipped cream topping until you're ready to serve for optimal freshness.
If you're thinking about freezing this tart, it's best to do so without the whipped cream and strawberries on top. Wrap the cooled tart tightly in plastic wrap and store it in an airtight container. It should maintain its quality for up to two months. Thaw the tart in the fridge overnight before serving, then finish with the whipped cream and strawberries just before presenting it.
Questions About Recipes
→ Can I use frozen strawberries instead of fresh?
While fresh strawberries work best for presentation and flavor, you can use frozen strawberries in a pinch. Just make sure to thaw and drain any excess water.
→ Can I make the tart crust ahead of time?
Absolutely! You can prepare the tart crust a day in advance and store it in the refrigerator until you're ready to use it.
→ How do I store leftover tart?
Store any leftovers in the refrigerator, covered with plastic wrap, and consume within 2-3 days for the best taste.
→ Can I substitute the heavy cream with something lighter?
Yes, you can use half-and-half or a lower-fat cream, but the tart won't be as rich and creamy.
Chocolate Strawberry Tart with Whipped Cream
Created by: The Sizedbliss Team
Recipe Type: Artisanal Baking Recipes
Skill Level: Intermediate
Final Quantity: 8 servings
What You'll Need
For the Tart Crust
- 1 1/4 cups all-purpose flour
- 1/2 cup unsalted butter, chilled and diced
- 1/4 cup powdered sugar
- 1 egg yolk
- 2 tablespoons cold water
For the Chocolate Filling
- 8 ounces dark chocolate, chopped
- 1 cup heavy cream
- 1/4 cup granulated sugar
- 2 teaspoons vanilla extract
- 2 tablespoons unsalted butter
For the Topping
- 1 cup heavy whipping cream
- 2 tablespoons powdered sugar
- 1 teaspoon vanilla extract
- Fresh strawberries, sliced
How-To Steps
In a bowl, combine flour and powdered sugar. Cut in butter until the mixture resembles coarse crumbs. Stir in egg yolk and cold water. Form into a ball, wrap in plastic, and refrigerate for 30 minutes.
Preheat the oven to 350°F (175°C). Roll out the chilled dough and fit it into a tart pan. Prick the bottom with a fork and bake for 20 minutes or until lightly golden. Allow to cool.
In a saucepan over low heat, combine heavy cream, sugar, and chopped chocolate. Stir until melted and smooth. Remove from heat and stir in butter and vanilla extract. Cool slightly before pouring into the tart shell.
In a mixing bowl, whip heavy cream with powdered sugar and vanilla extract until soft peaks form. Spread or pipe onto the cooled tart, topped with sliced strawberries.
Chill the tart for at least 2 hours before slicing. Serve chilled and enjoy your delicious dessert!
Extra Tips
- For a more intense chocolate flavor, consider using a higher percentage of dark chocolate. Also, fresh strawberries are key—look for ones that are firm and bright red.
Nutritional Breakdown (Per Serving)
- Calories: 360 kcal
- Total Fat: 25g
- Saturated Fat: 15g
- Cholesterol: 130mg
- Sodium: 95mg
- Total Carbohydrates: 30g
- Dietary Fiber: 2g
- Sugars: 20g
- Protein: 5g